The openHAB Cloud solution offers the possibility to make your openHAB based smart home environment accessible over the internet. Besides offering proxy access directly to your local instance, it enables e.g. remote app access, push notifications, and integration with other cloud based services like IFTTT, Amazon Alexa and others.
It can be either hosted on your own server (for further information how to set up the system, please have a closer look at the GitHub repository of openHAB Cloud) or you can use the public and freely accessible instance hosted by the openHAB Foundation e.V. In this blog post I’ll refer to the latter. It assumes, that you have already set up your openHAB instance and your devices.
All file system paths mentioned here are valid for an APT based installation. This is e.g. the case, if your instance is hosted on Raspbian and you used the available installation package. The documentation provides an overview. The blog post generally refers to openHAB version 2.1.
Set up openHAB Cloud Connector
The communication with the openHAB Cloud instance requires the openHAB Cloud Connector being installed on your local instance. There is a separate chapter available in the documentation, which helps during setup. Besides that, we will have a closer look at the necessary steps here.
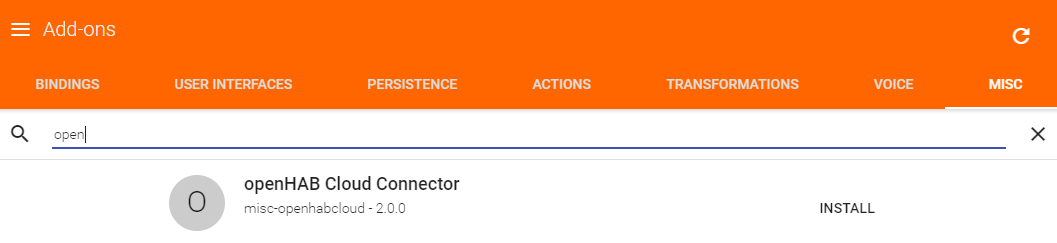
You can install the openHB Cloud Connector via Paper UI or configuration in your /etc/openhab2/services/addons.cfg file.
# A comma-separated list of miscellaneous services to install (e.g. "myopenhab")
misc = openhabcloud
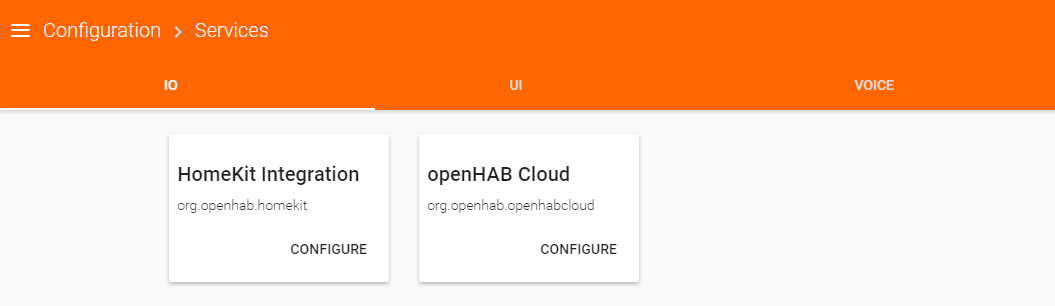
After the connector is installed, some configuration needs to be done. Please navigate to “Configuration” and then to “Services” in your Paper UI. After clicking on the button belonging to the openHAB Cloud entry, the configuration dialog is shown.
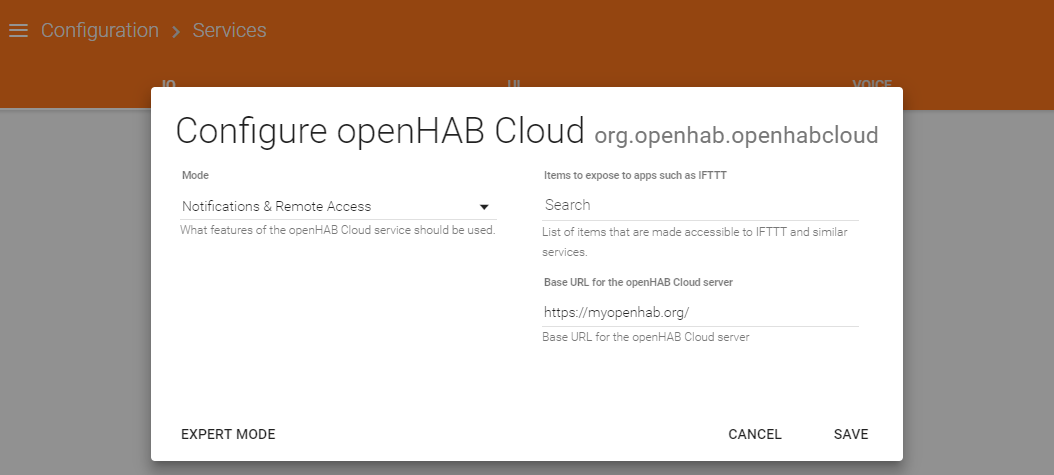
First of all you can select the mode. The first option gives the permission for only sending notifications via openHAB Cloud (“Notifications”). The second one (“Notifications & Remote Access”) additionally enables remote access to your openHAB dashboard including available UIs.
The second configuration section can be used for making items available for other cloud services like e.g. IFTTT. This is not necessary in our context, but you might want to come back to this setting later.
Third and most important, you need to set the URL of the openHAB Cloud instance to connect to. In our case, this is the one hosted under https://myopenhab.org/.
Afterwards we need to have a look at two files, which were generated by openHAB after setting up the openHAB Cloud connector. One file contains the UUID of your instance and is located in /var/lib/openhab2/uuid. The other one is located in /var/lib/openhab2/openhabcloud/secret and contains the password. Those credentials are necessary in the next steps.
Create a new account on myopenhab.org
As already mentioned, the openHAB foundation offers a free and public instance of the openHAB Cloud service reachable via myopenhab.org. We will connect our local instance to this service by using the previously installed openHAB Cloud Connector. Therefore we need to create a new account on myopenhab.org first.

Please provide your mail address, an account password and the previously identified UUID and password of your local openHAB instance. After you confirmed the terms and conditions, you can create your account by clicking on the register button.
It might be important to know, that you can use your mail address only for a single instance of openHAB. In my case, one instance is running in my apartment and another one runs at my parents’ home. In this scenario, I needed to register two different email addresses. Maybe this use case will be supported in the future. It seems like there are others with similar requirements, because there is already some progress in this topic. For further details, please have a look at the corresponding ticket.
Configuring openHAB Cloud
Once your account was created and you logged in, you can browse the different pages offered there. We won’t cover them all, but the users section is worth a look. You are able to access your local instance via openHAB Cloud with your personal credentials. In addition, you can create some more users, who will then be able to access your smart home environment also.
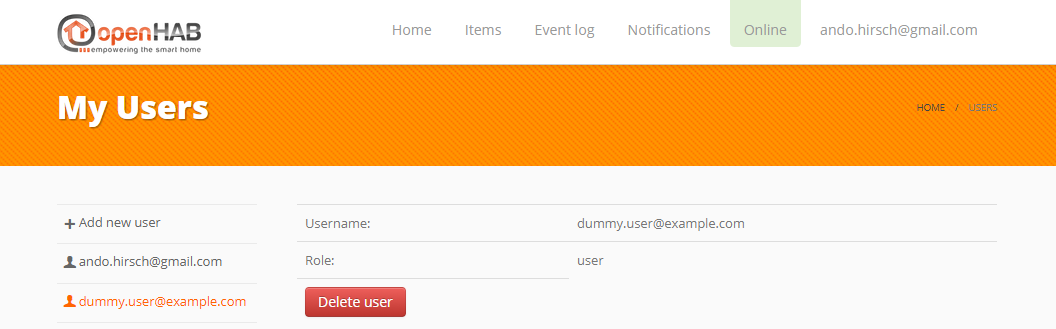
A “normal user” is able to manage personal settings and has access to dashboard and the UIs. A “master user” additionally is able to manage the settings influencing the connection between openHAB Cloud and the local instance. Master users are also permitted to manage the openHAB cloud users assigned to the account.
Please keep in mind, that those roles only affect the openHAB Cloud permissions. This has no effect on your local instance, i.e. both roles have the same access to your local dashboard and UIs!
Remotely accessing the local instance
After the steps described so far are done, you can access your local instance by logging in to myopenhab.org, opening the “Home” tab and clicking on the link labeled “Click here to access your openHAB’s dashboard”. As an alternative, you can directly access your dashboard via https://home.myopenhab.org/start/index.
Additionally, you can access your smart home environment remotely via apps provided for Android and iOS (without openHAB Cloud you can use them only, if you are in the same network). Just install the app, set the remote URL to https://myopenhab.org, and enter the credentials of your account.
Conclusion
With openHAB Cloud and the free and public instance myopenhab.org, the openHAB ecosystem offers a solution for enabling remote access to your local instance. In addition to the web access, you can use already available apps for monitoring your local smart home environment.
Besides use cases related to remote access, it enables the integration with other cloud services like IFTTT and systems like Amazon Alexa. The latter might be part of another blog post.
Leave A Comment
I'd love to hear your opinion and experiences. Share your thoughts with a comment below! Please note that comments will appear after moderation.